What Varya helps you make
Varya is built for creating audio-reactive music visualizers: visuals that move with the energy, rhythm, and feel of a track. Instead of starting with a blank timeline in a video editor, you start with the song and shape a visual system around it. That makes it useful for artists, producers, labels, YouTube channels, DJs, podcasters, and creators who need music-led visuals without building every animation by hand.
A good visualizer is not only a decorative effect. It gives the track a visual identity. It can turn a single cover image into a full video, create a clean overlay for an edit, or generate vertical visuals for short-form platforms. The workflow below explains how to move through Varya in a practical order so the final export is designed for the place where it will be used.
Step 1: Sign in and understand the workspace
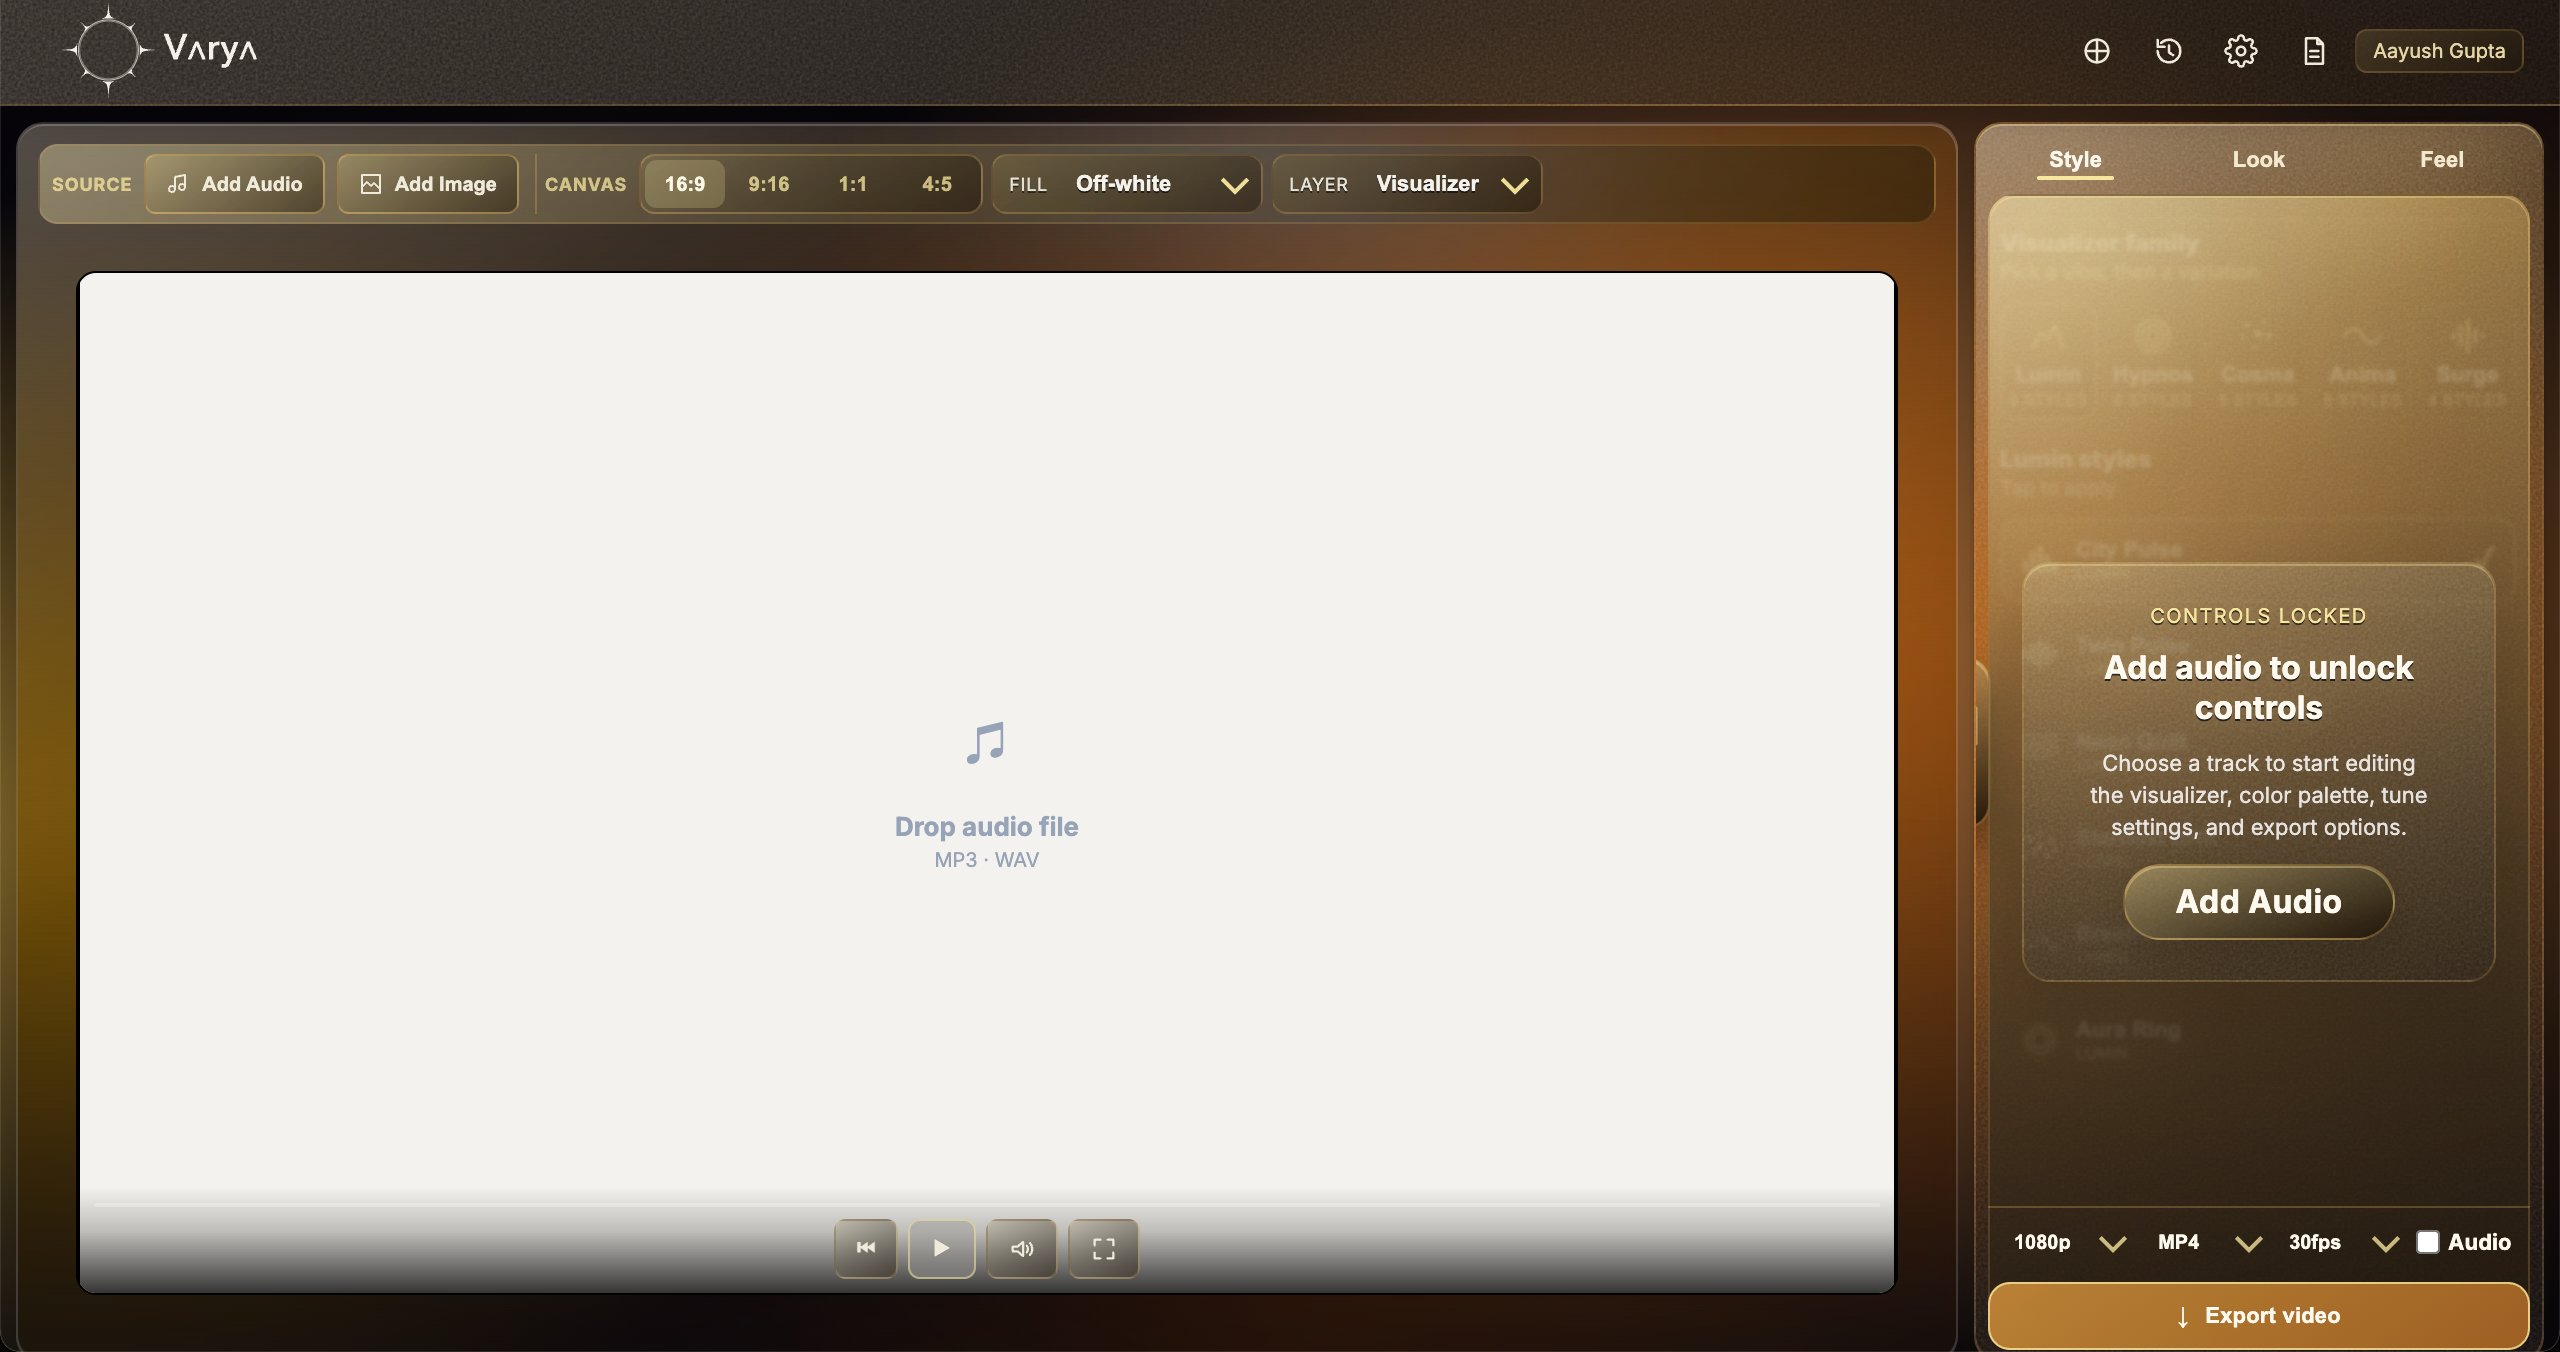
After signing in, you arrive in the main Varya workspace. The large canvas is where the visual will live. The source controls let you add the track and optional artwork. The canvas controls decide the shape of the final video. The right-side controls shape the visualizer style, color, and response. The export area turns the finished visual into a video file.
Think of the workspace like a small studio. Audio drives the motion, artwork sets the environment, Style gives the visual its shape, Look gives it color, Feel gives it behavior, and Export decides how the visual leaves Varya. If you follow that order, the process stays clear and you avoid making design decisions before the format is known.
Step 2: Set up the vibe before styling
Start with the source and canvas. Add the audio first so Varya can read the pulse, movement, and energy of the track. Then decide whether the visual needs a background image. Add artwork, a cover, or a still image when you want a finished full-frame music video. Do not add an image when the goal is a transparent overlay for another editing tool.
Next, choose the canvas size. This choice matters because it changes how the visualizer feels. A 16:9 canvas gives space for YouTube and landscape videos. A 9:16 canvas is better for Reels, Shorts, TikTok, and vertical edits. A 1:1 canvas works for square posts, while 4:5 fits portrait feed formats. Set this early so scale and composition decisions make sense.
- Add audio first so the visualizer responds to the real track.
- Add a background image only when you want a complete scene.
- Skip the background image when creating transparent overlays.
- Choose 16:9, 9:16, 1:1, or 4:5 based on where the visual will be posted.

Step 3: Shape Style, Look, and Feel
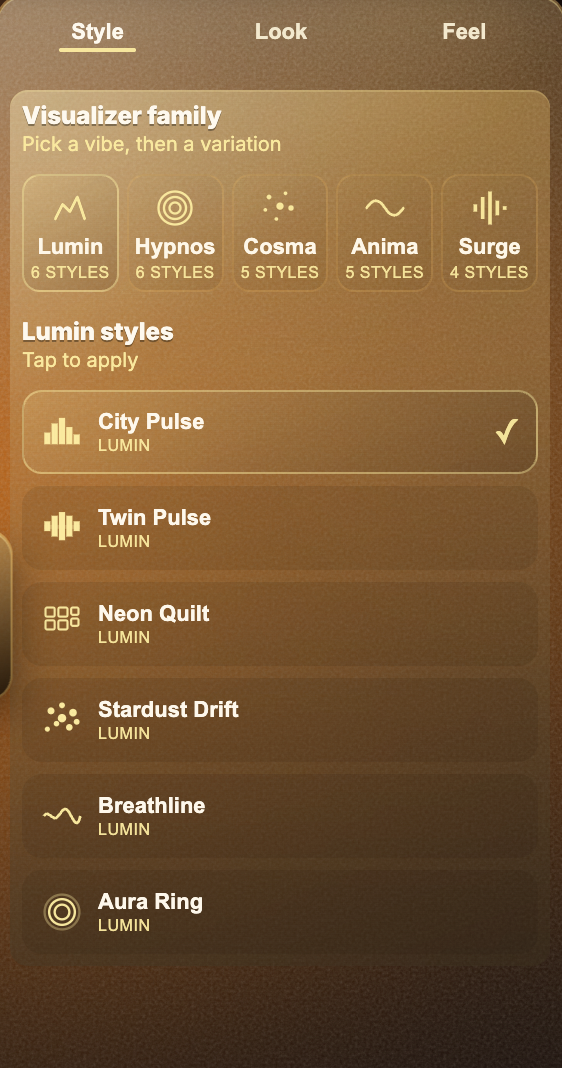
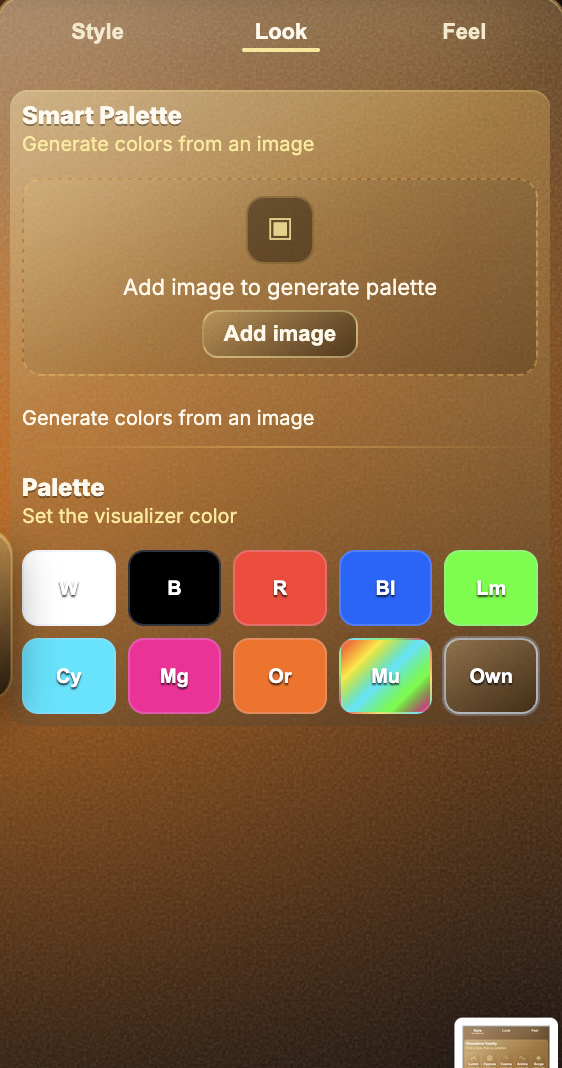
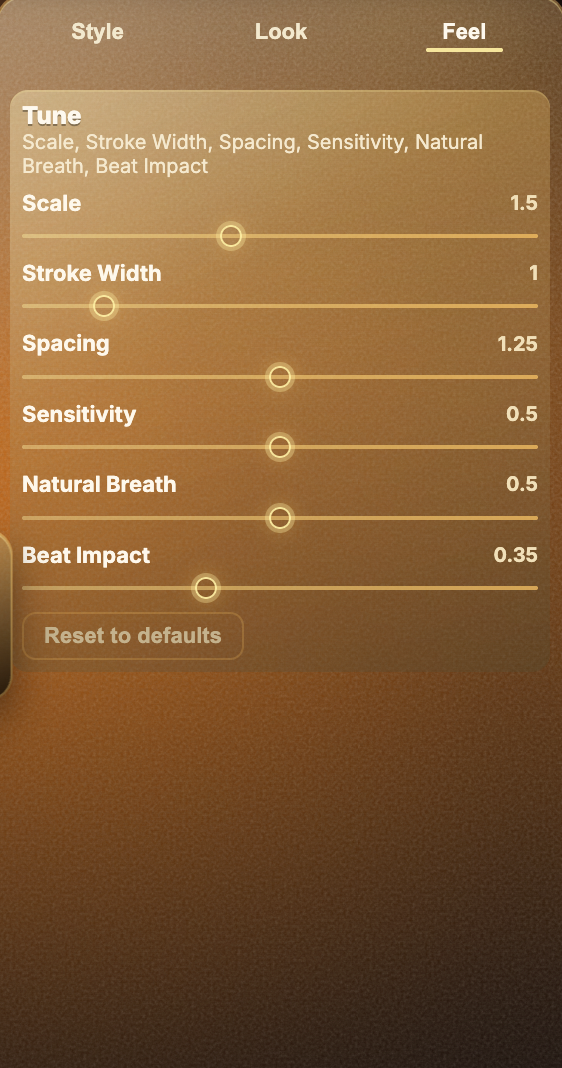
Once the foundation is set, move into creative tuning. Style chooses the visualizer family and variation. This is the biggest visual decision because it defines the shape language: pulsing, flowing, geometric, minimal, sharp, soft, or energetic. Look controls the color direction. Feel controls scale, stroke width, spacing, sensitivity, natural breath, beat impact, and other motion behavior.
The best result usually comes from matching the song mood rather than picking the loudest effect. A calm track may need slow motion and a soft palette. A club track may need bigger beat impact and stronger color. If you add a background image, Smart Palette can help find colors that sit naturally with the artwork instead of fighting it.
Step 4: Export for the right destination
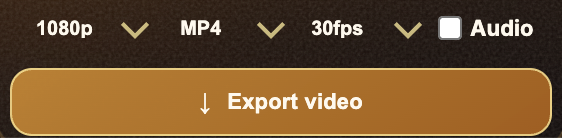
Export settings should match the job. Use MP4 when you want a finished video for YouTube, social media, or quick sharing. Use an overlay workflow when the visualizer needs to sit over footage in another editor. For MP4 overlays, use a black background and Screen blending in the editor. For true transparency, export a transparent ProRes file when that format is available in your workflow.
Before exporting, decide whether the file should include audio. If this is the final music video, keep audio on. If the export is only an overlay for a timeline that already has the mixed track, turn audio off. That keeps the editing timeline cleaner and prevents accidental duplicated audio.
Where to go next
After learning the basic Varya workflow, the next step is choosing a destination-specific process. A YouTube visualizer usually needs a finished 16:9 MP4. Reels and Shorts usually need 9:16. Editor overlays need either MP4 plus Screen blending or ProRes with real transparency. The best workflow depends on whether you are posting directly or compositing inside another app.
Use the related guides below to choose the right export path. The important thing is to decide the destination before you export, because canvas size, background, audio, and format all depend on that final use case.